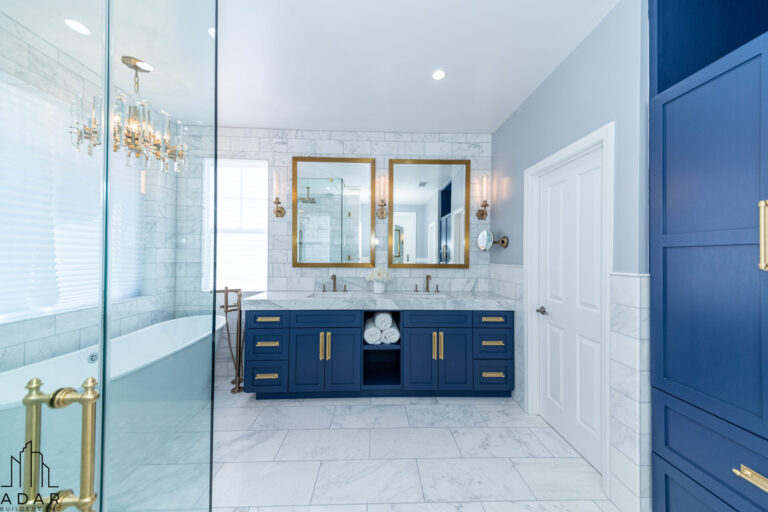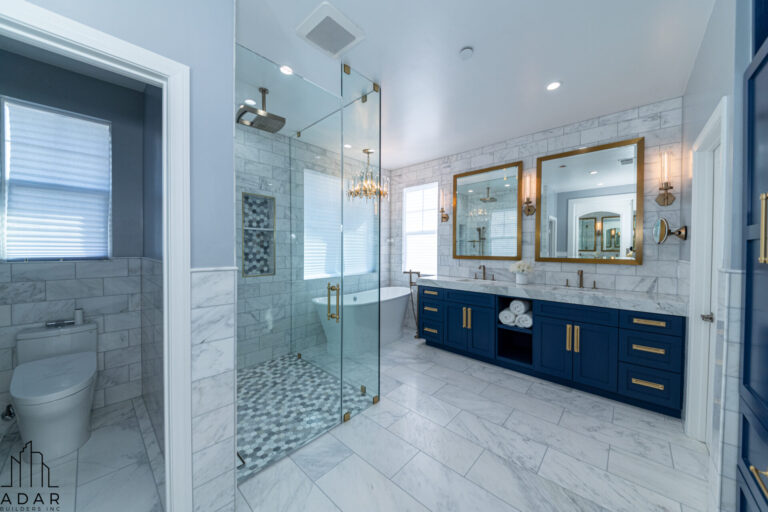

Bathroom remodeling should start with one practical question: how will the space handle water every day? Before tile, fixtures, and finishes are finalized, the design should account for both direct water exposure and the humid air created during daily use. Planning waterproofing and ventilation with the layout from the beginning creates a stronger foundation for every design decision that follows.
Why Should Waterproofing and Ventilation Come First in Bathroom Remodeling?
Waterproofing and ventilation should be planned before bathroom finishes because they can affect the layout, construction, and feasibility of the design. The shower layout, wet areas, drainage, and airflow need to be coordinated as part of the room plan rather than added after the visible selections are made.
For a bathroom remodel, this means coordinating moisture control with the design before materials are ordered and the construction scope is set. Once those requirements are clear, finishes can be selected around a plan that already accounts for how the bathroom will handle water and humidity.
How Should the Bathroom Layout Define Wet and Dry Zones?
A bathroom layout should establish where direct water exposure is expected and keep cabinetry, storage, entrances, and other drier areas outside that zone when possible. The shower or tub usually defines the main wet area, while the opening, glass, and nearby fixtures determine how far everyday splash can travel.
Define Where the Wet Zone Ends
The wet zone includes the shower or tub and the surrounding areas likely to receive regular splash. Its size depends on more than the footprint of the fixture itself.
An open shower, for example, may expose more of the bathroom floor than a fully enclosed design. A vanity or storage cabinet placed too close to the shower opening may also receive repeated water exposure even though it sits outside the shower.
During bathroom remodeling, these relationships should be considered before fixture locations are finalized. Clear wet and dry zones make it easier to place cabinetry, storage, and circulation areas where they are less exposed to direct water.
Use the Shower Opening and Glass to Control Splash
The shower opening is one of the main boundaries between the wet and dry areas of the bathroom. Its position should work with the direction of the showerhead, the glass configuration, and the location of nearby fixtures.
A fixed glass panel can help contain spray while maintaining a more open design. A wider opening may improve access but also allow more water to reach the surrounding floor if the showerhead faces toward it.
The layout should therefore be evaluated based on how the bathroom will actually be used, not only how it appears on a floor plan. Before the shower size, glass, vanity, or surrounding fixtures are finalized, the design should account for where water is most likely to travel during daily use.
These relationships become especially important when designing a small bathroom, where the shower opening, vanity, storage, and circulation areas may need to share a limited footprint.
How Should Waterproofing Influence the Shower Design?
Waterproofing should influence the shower design because the entry, drain, built-in features, and surrounding wet surfaces all become part of the same water-management system. Depending on the shower assembly, that system may use a bonded sheet membrane, a liquid-applied membrane, a waterproof backer system, or another compatible method selected for the construction.
Whatever system is used, the waterproofed area needs to remain continuous across the shower floor, walls, corners, drain connection, penetrations, niches, benches, and any transition to the surrounding bathroom floor.
Decide Between a Curbed and Curbless Entry Early
A curb creates a raised boundary that helps contain water inside the shower. A curbless entry removes that barrier, so the floor slope, drain, waterproofing, and transition to the surrounding bathroom floor have to work together more closely.
This choice affects how the shower floor is built and how far the waterproofed area needs to extend. It can also determine whether the desired entry works with the available floor conditions and overall bathroom layout.
Plan Niches and Benches Before Waterproofing
Niches and benches add useful features to a shower, but they also introduce more corners, transitions, and horizontal surfaces into the wet area.
Their size and position should be established before the shower walls and waterproofing system are built. A niche must work with the framing and anything already inside the wall, while shelves and benches need surfaces that direct water back toward the shower rather than allowing it to collect.
Planning these features early allows them to become part of the waterproofed assembly instead of being treated as additions after the shower design is already set.
Coordinate the Drain With the Shower Floor
The drain location and shower floor need to be designed together because the floor must direct water toward the drain.
A center or offset drain typically requires slope from several directions, while a linear drain can support a different floor configuration. The best option depends on the shower dimensions, entry, tile layout, and overall design rather than appearance alone.
Coordinating the drain with the entry and built-in features helps the shower function as one complete waterproofed system.
How Should Bathroom Ventilation Influence the Design?
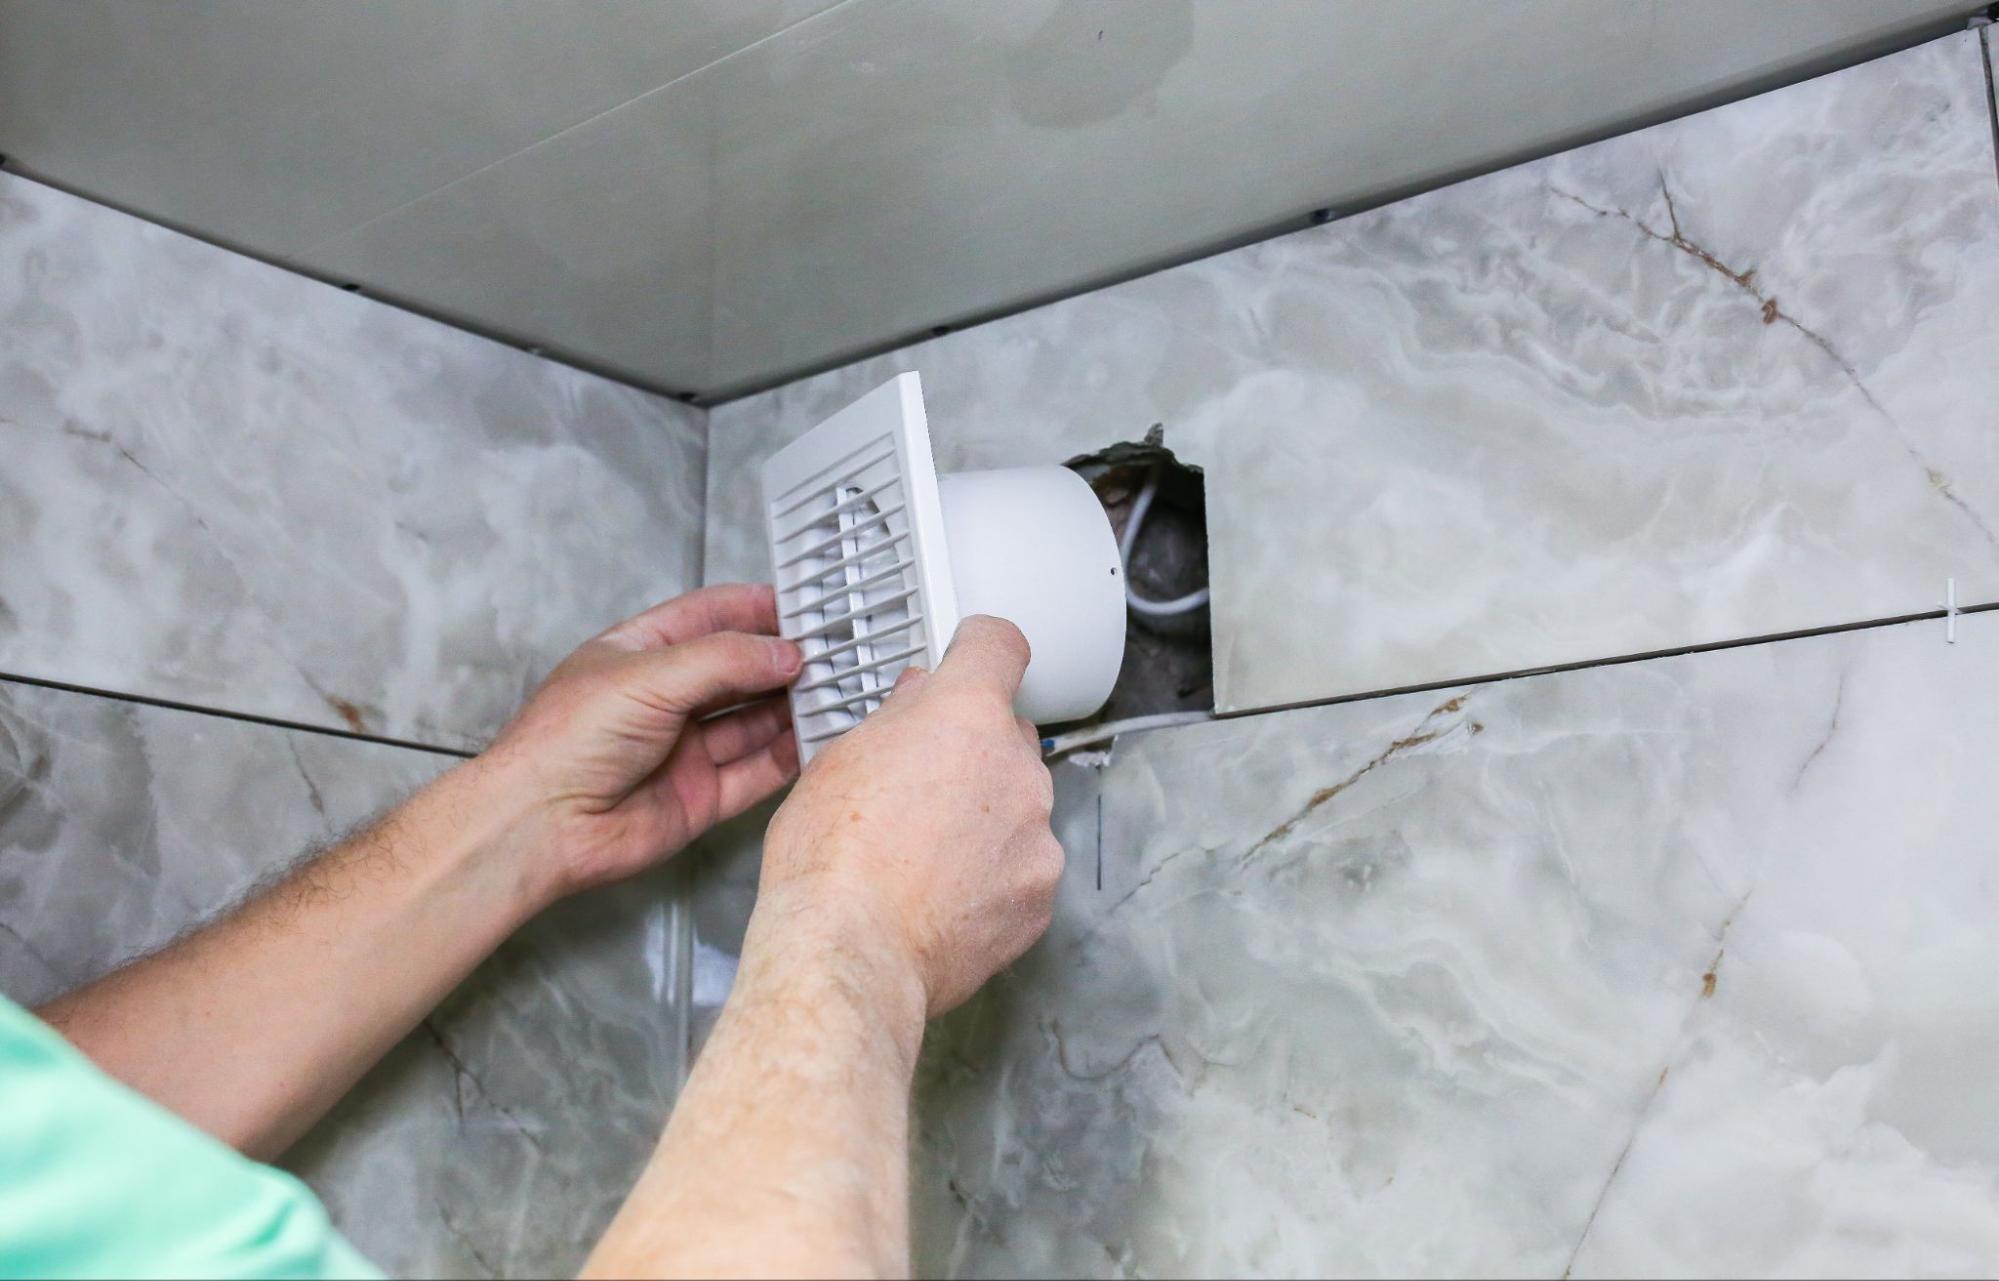
Bathroom ventilation should be planned with the room layout because fan placement, room configuration, and the route to the exterior all affect how effectively humid air can leave the space. The exhaust point should work with the shower, partitions, ceiling, and lighting rather than being treated as an isolated ceiling fixture.
For demand-controlled bathroom exhaust, California’s 2025 Energy Code specifies a minimum airflow of 50 cubic feet per minute (CFM). That provides a useful baseline when evaluating the ventilation plan, but the fan still needs to work with the room layout and the duct route used in the finished installation.
Place the Fan Near the Main Moisture Source
The bathroom exhaust fan should be positioned where it can capture humid air close to where most of it is produced, usually near the shower or tub.
In a compact bathroom, the best location may be relatively straightforward. In a larger primary bathroom, partitions, shower glass, or a separate toilet room can affect how easily humid air reaches the exhaust point.
Fan placement also needs to work with ceiling lights, framing, and other fixtures. Planning these elements together helps avoid placing the fan where the room design limits its effectiveness.
Plan the Fan and Duct Route Together
The selected fan location needs a practical path for exhausting air outdoors. Framing, attic access, exterior walls, and the ceiling layout can all affect that route.
A shorter, more direct duct path with fewer bends generally helps the system move air more effectively. For that reason, the fan should not be positioned based on the ceiling plan alone and then connected to whatever duct route remains available.
For bathroom remodeling in Los Angeles, ventilation may also need to meet applicable California requirements depending on the project scope. Ventilation is also one of several bathroom remodeling upgrades that should be evaluated as part of how the finished room will function, rather than as an isolated fixture choice.
How Should Moisture Exposure Guide Bathroom Material Choices?
Bathroom materials should be selected according to where they will be installed and whether they face direct water, occasional splash, or mainly humidity. A finish that works well in one part of the room may not be appropriate in another, so material choices should follow the wet-zone and ventilation plan already established for the remodel.
Use Wet-Area Finishes as Part of a Complete Assembly
Surfaces inside the shower experience the highest level of water exposure. Tile and other wet-area finishes should therefore be considered together with the substrate and waterproofing behind them.
A water-resistant finish does not replace the waterproofing needed underneath it. The visible surface provides the look and wear layer, while the assembly behind it manages water that can reach joints, corners, and transitions.
This distinction is especially important around shower floors, walls, niches, and benches, where the finish becomes part of a larger waterproofed system.
Choose Bathroom Flooring for Water Exposure and Wet Use
Bathroom flooring may encounter splash, damp feet, and occasional standing water even when it sits outside the shower.
The material should tolerate the level of moisture expected in that part of the room and provide appropriate traction when wet. Areas directly beside a shower or tub may need more water resistance than sections farther from the wet zone.
Flooring should therefore be chosen according to how the bathroom will actually be used, not only how well the material matches the visual design.
Match Cabinetry and Wall Finishes to Splash and Humidity
Vanities, storage, trim, and painted walls generally face less direct water than the shower, but they still have to handle bathroom humidity and occasional splash.
Placement matters. Cabinetry beside a shower opening or tub may experience more repeated moisture than storage on the opposite side of the room. Painted walls and trim near wet areas also need finishes suited to the conditions they will encounter.
Matching each material to its actual moisture exposure keeps the finish choices consistent with the bathroom’s waterproofing, ventilation, and daily use.
What Should Be Checked Before the Bathroom Design Is Finalized?
Before a bathroom design is finalized, check the existing plumbing and drain locations, floor and wall conditions, signs of moisture exposure, and the current ventilation route. These conditions can determine whether the proposed layout and shower design work as planned or need to be adjusted.
Key items to review include:
- Plumbing and drain locations: Moving or enlarging a shower may depend on where the existing drain and supply lines are located.
- Floor and wall conditions: The existing structure should be checked where it may affect the shower entry, floor transitions, or wet-area design.
- Signs of previous moisture exposure: Staining, soft materials, loose finishes, recurring dampness, or evidence of past repairs may point to conditions that need closer evaluation.
- Existing ventilation: Confirm the fan location, duct route, and whether the system properly exhausts outdoors.
Some conditions can only be confirmed after demolition. The initial evaluation should therefore identify which parts of the design can be finalized now and which details may need to remain flexible until concealed conditions are visible.
When Can Waterproofing or Ventilation Add Work to a Bathroom Remodel?
Waterproofing or ventilation can expand the scope of a bathroom remodel when the design requires changes to the floor, plumbing, walls, ceiling, or ductwork, or when demolition reveals conditions that need to be corrected before new finishes are installed.
Common scope changes include:
- Curbless or larger showers: These designs may require additional floor preparation, drainage work, or a wider waterproofed area than a conventional shower.
- Drain or plumbing relocation: Moving a shower, changing its size, or repositioning the drain can add rough plumbing and may affect the surrounding floor or walls.
- Fan or duct changes: If the existing exhaust location does not work with the new layout, the remodel may require ceiling, electrical, or ductwork modifications to create a practical route outdoors.
- Steam shower design: A steam shower requires a more comprehensive approach to vapor control and enclosure detailing than a standard shower.
- Concealed moisture damage: If demolition exposes damaged substrate, framing, or an inadequate existing waterproofing assembly, those conditions may need to be corrected before the new shower or finishes can be installed.
These changes can affect several parts of the project at once, which is why bathroom remodeling services should account for moisture control, plumbing, ventilation, and finish work as part of the same construction plan.
That does not automatically mean the original design has to be abandoned. Instead, the added work helps define the construction needed to support the design before installation moves forward.
What Should Be Specified and Verified Before Bathroom Finishes Are Installed?
Before tile, wall finishes, or ceilings conceal the work, the remodeling plan should clearly identify how the waterproofing and ventilation systems will be built. The plan should define the important parts of each system clearly rather than rely on general notes such as “waterproof shower” or “install exhaust fan.”
Specify the Waterproofing Assembly
The plan should identify the type of waterproofing assembly being used and how it will continue across the shower floor, walls, drain, corners, penetrations, niches, benches, and any transition to the surrounding bathroom.
Specify the Ventilation System
The plan should identify the fan location, appropriate airflow for the room, controls, duct route, and where the duct will terminate outdoors. The fan and duct should be considered as one system rather than separate components.
Before these systems are covered by finishes, confirm that required inspections and any checks specified for the selected waterproofing or ventilation system have been completed. This creates a clear quality-control point while the work is still visible and corrections can be made without removing finished materials.
How Do You Know if a Bathroom Design Choice Works for Your Remodel?
A bathroom design choice makes sense when it improves how you use the space, works with the moisture-management plan, fits the existing conditions, and justifies any additional construction it requires. Each choice should be weighed against the construction it adds and the benefit it provides in daily use.
Use four questions to evaluate each major choice:
- Does it improve how you use the bathroom? A larger shower, curbless entry, niche, or more open layout should solve a practical need rather than add complexity without a clear benefit.
- Can it manage water and humidity properly? The design still needs to work with the waterproofing, drainage, and ventilation strategy established for the space.
- Does it work with the existing bathroom? Plumbing locations, floor conditions, available space, and the ventilation route can determine whether an idea fits the home as planned.
- Is the added scope worthwhile for the result? Some choices may require more plumbing, floor, ceiling, or ductwork. That added work may still make sense when the improvement is important to how you want the finished bathroom to function.
Evaluating design choices this way helps separate ideas that simply look appealing from those that make sense for the way the bathroom will be built and used.
Plan Your Bathroom Remodel With the Details Resolved Early
A bathroom design works best when the visible choices fit the conditions behind them. At Adar Builders, we can help you evaluate the layout, existing conditions, and construction requirements together, then turn those decisions into a practical remodeling plan for your Los Angeles home. Talk with our team about your bathroom remodel.